Download the CDE package from:
https://github.com/Zapotek/arachni/downloads
Linux users enjoy the privilege of a CDE package which is a compressed archive and contains a full preconfigured Linux environment in the form of a sandbox.
Quick Basic Usage of Arachni:
To see help type :
$ arachni -hYou can check the options here.
You can simply run Arachni like:
$ arachni http://test.com /plugins/defaultsIn the following example all modules will be run against http://site.com, auditing links/forms/cookies and following subdomains —with verbose output enabled.
The results of the audit will be saved in the the file site.com.afr.
$ arachni -fv http://site.com --report=afr:outfile=site.com.afr To load all xss modules using a wildcard:
$ arachni http://example.net --mods=xss_*To load all audit modules using a wildcard:
$ arachni http://example.net --mods=audit*To exclude only the csrf module:
$ arachni http://example.net --mods=*,-csrfOr you can mix and match; to run everything but the xss modules:
$ arachni http://example.net --mods=*,-xss_* Performing a full scan quickly
The full profile adds header auditing to the defaults.You can use it like:
$ arachni --load-profile=profiles/full.afp http://site.net You have lots of options/flags/modes to explore here based on ur usage. for example we have Debug mode :
When this flag is enabled the system will output a lot of messages detailing what’s happening internally.
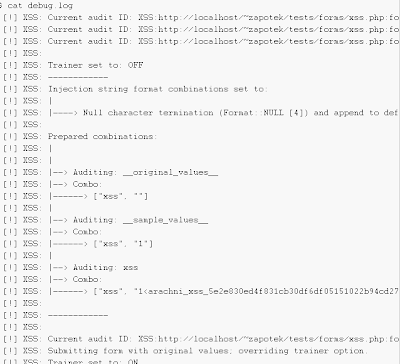
If you don’t want to be flooded by annoying and obscure messages you can pipe debugging output to a separate file when running Arachni using:
$ arachni -pv --mods=xss http://localhost/~zapotek/tests/forms/xss.php --debug The debug.log file will contain something like:
Arachni WEB UI
now unzip it ,goto the folder location you will find the arachni console and web UI
There are two ways to start WEB UI :
just type in shell prompt :
$ arachni_web_autostartThis will setup a local Dispatcher, the WebUI server and even open up your browser.
or
Start a Dispatcher like:
$ arachni_rpcd $ arachni_web And finally open up a browser window and visit: http://localhost:4567/
The WebUI supports HTTP Basic auth which you can configure using the Username and Password
The WebUI can serve many purposes ranging from just a simple way to use Arachni to a Grid construction and management interface.
You can use it to perform and monitor a single scan, hassle-free, via
any web-browser enabled device or use it to setup a worldwide High
Performance Grid of Arachni scanners ready to combine their resources in
order to perform lightning fast audits.
The first page, so eloquently entitled ‘Start a scan’, allows you to do just that.
A single scan can be performed easily enough, you just select a Dispatcher, enter the URL of your target and hit ‘Launch Scan’.
A high performance scan utilizes more than one Arachni Instance to perform the audit.
The master instance will perform the crawl and then calculate and distribute the workload amongst its slaves.
This allows scan-time to be severely decreased.
Once you have set up a Grid (i.e. configured at least 2 Dispatchers to have each other as neighbours) the “Start a scan” screen will change to this:
Modules and Plug-ins
The Modules and Plug-ins pages are pretty self-explanatory, they simply allow you to select which components to load.Settings
Nothing special, these options have the same effects as their CLI(Command Line Interface) counterparts.Reports
This page contains a list of audit reports along with the option to convert them to a fair amount of different formats.Log
Not much to add to this, the name says it all:
Shutdown
You can kill the WebUI by sending Ctrl+C to the console from which you started it.:)...:)


